Ijo-o Shrine location and walkthrough in Zelda: Tears of the Kingdom
How to complete the Ijo-o Shrine in Zelda: Tears of the Kingdom, including its location and the full More than Defense puzzle solution.
This article references relevant content from the polygon.com website. Original article link: [https://www.polygon.com/zelda-tears-of-the-kingdom-guide/23710090/ijo-o-shrine-puzzle-solution-chest]

Ijo-o Shrine is a shrine within The Legend of Zelda: Tears of the Kingdom’s Hebra Mountains Sky region.
Our guide will help you find the Ijo-o Shrine location, solve its puzzles, and walk you through the “More than Defense” challenge so you can collect the chest and Light of Blessing.
When you’re done, our shrine locations page or interactive Hyrule map can direct you toward something else to do.
Ijo-o Shrine Location
The Ijo-o Shrine is found within the West Hebra Sky Archipelago in the Hebra Mountains Sky region. You can find the shrine located on an island floating at a very high elevation. The exact coordinates are (-3863, 2684, 0702).
It’s a large island, so it’s possible there are multiple ways to access it. We got there by riding a prebuilt hot air balloon located on an island just south of the shrine’s location at these coordinates (-3833, 2486, 0566).
When you find the air balloon, activate it and keep riding it up until you see the bright neon-green swirl of the shine located north of the platform. Wait until you are up high enough, and glide down to the island the shrine is on. (For context, we used up about two full charges of energy cell to get there, so if you go this route, make sure it’s upgraded to at least that, or grab a couple of extra Zonai batteries to attach to the balloon).
Ijo-o Shrine walkthrough
This shrine requires you to solve all sorts of puzzles that involve shields. It’s pretty straightforward, but we got you covered in case you have any questions.
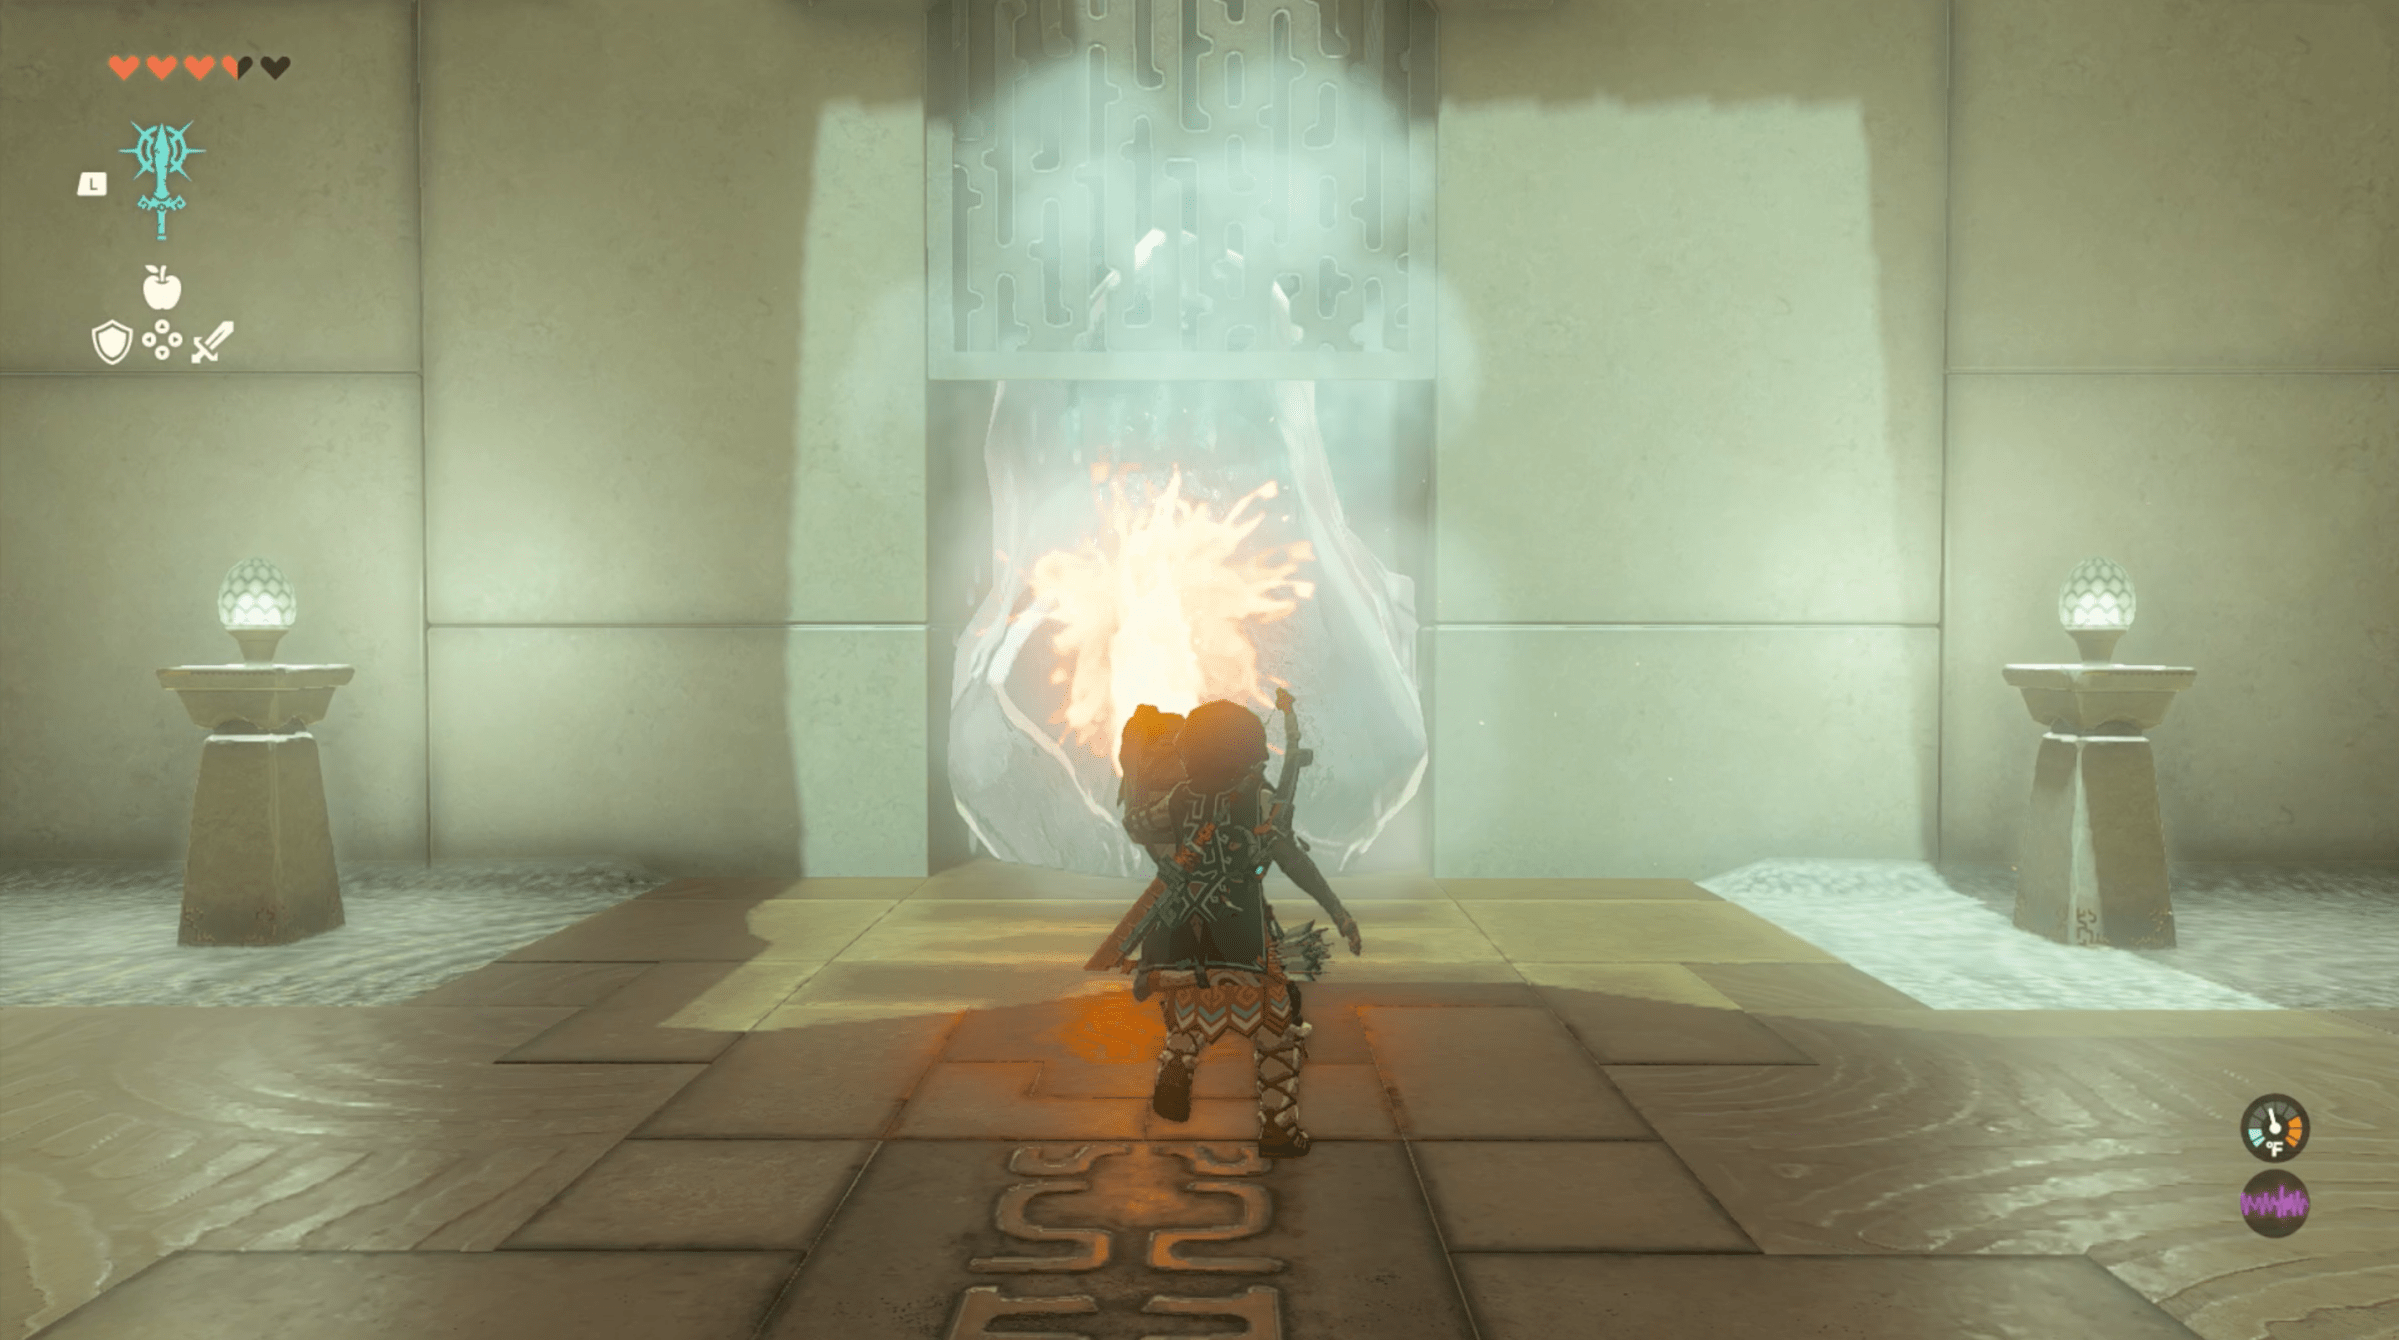
1. Walk forward into the shrine and defeat the Construct on your right. It will drop a flame emitter shield. Pick it up and equip it.
2. Straight ahead of where you entered, you’ll see a pathway blocked by a large chunk of ice. Use the Fused flame emitter shield to melt the ice and open the path ahead.
3. Walk through the hallway and enter the next room. Defeat another Construct to your left; it’ll drop a stone-slab shield that Link can pick up.
4. Before you continue to the next area, there is a block of ice across the room from where you defeated the second Zonai Construct. Walk across and melt the ice to reveal a chest containing a bundle of five arrows.
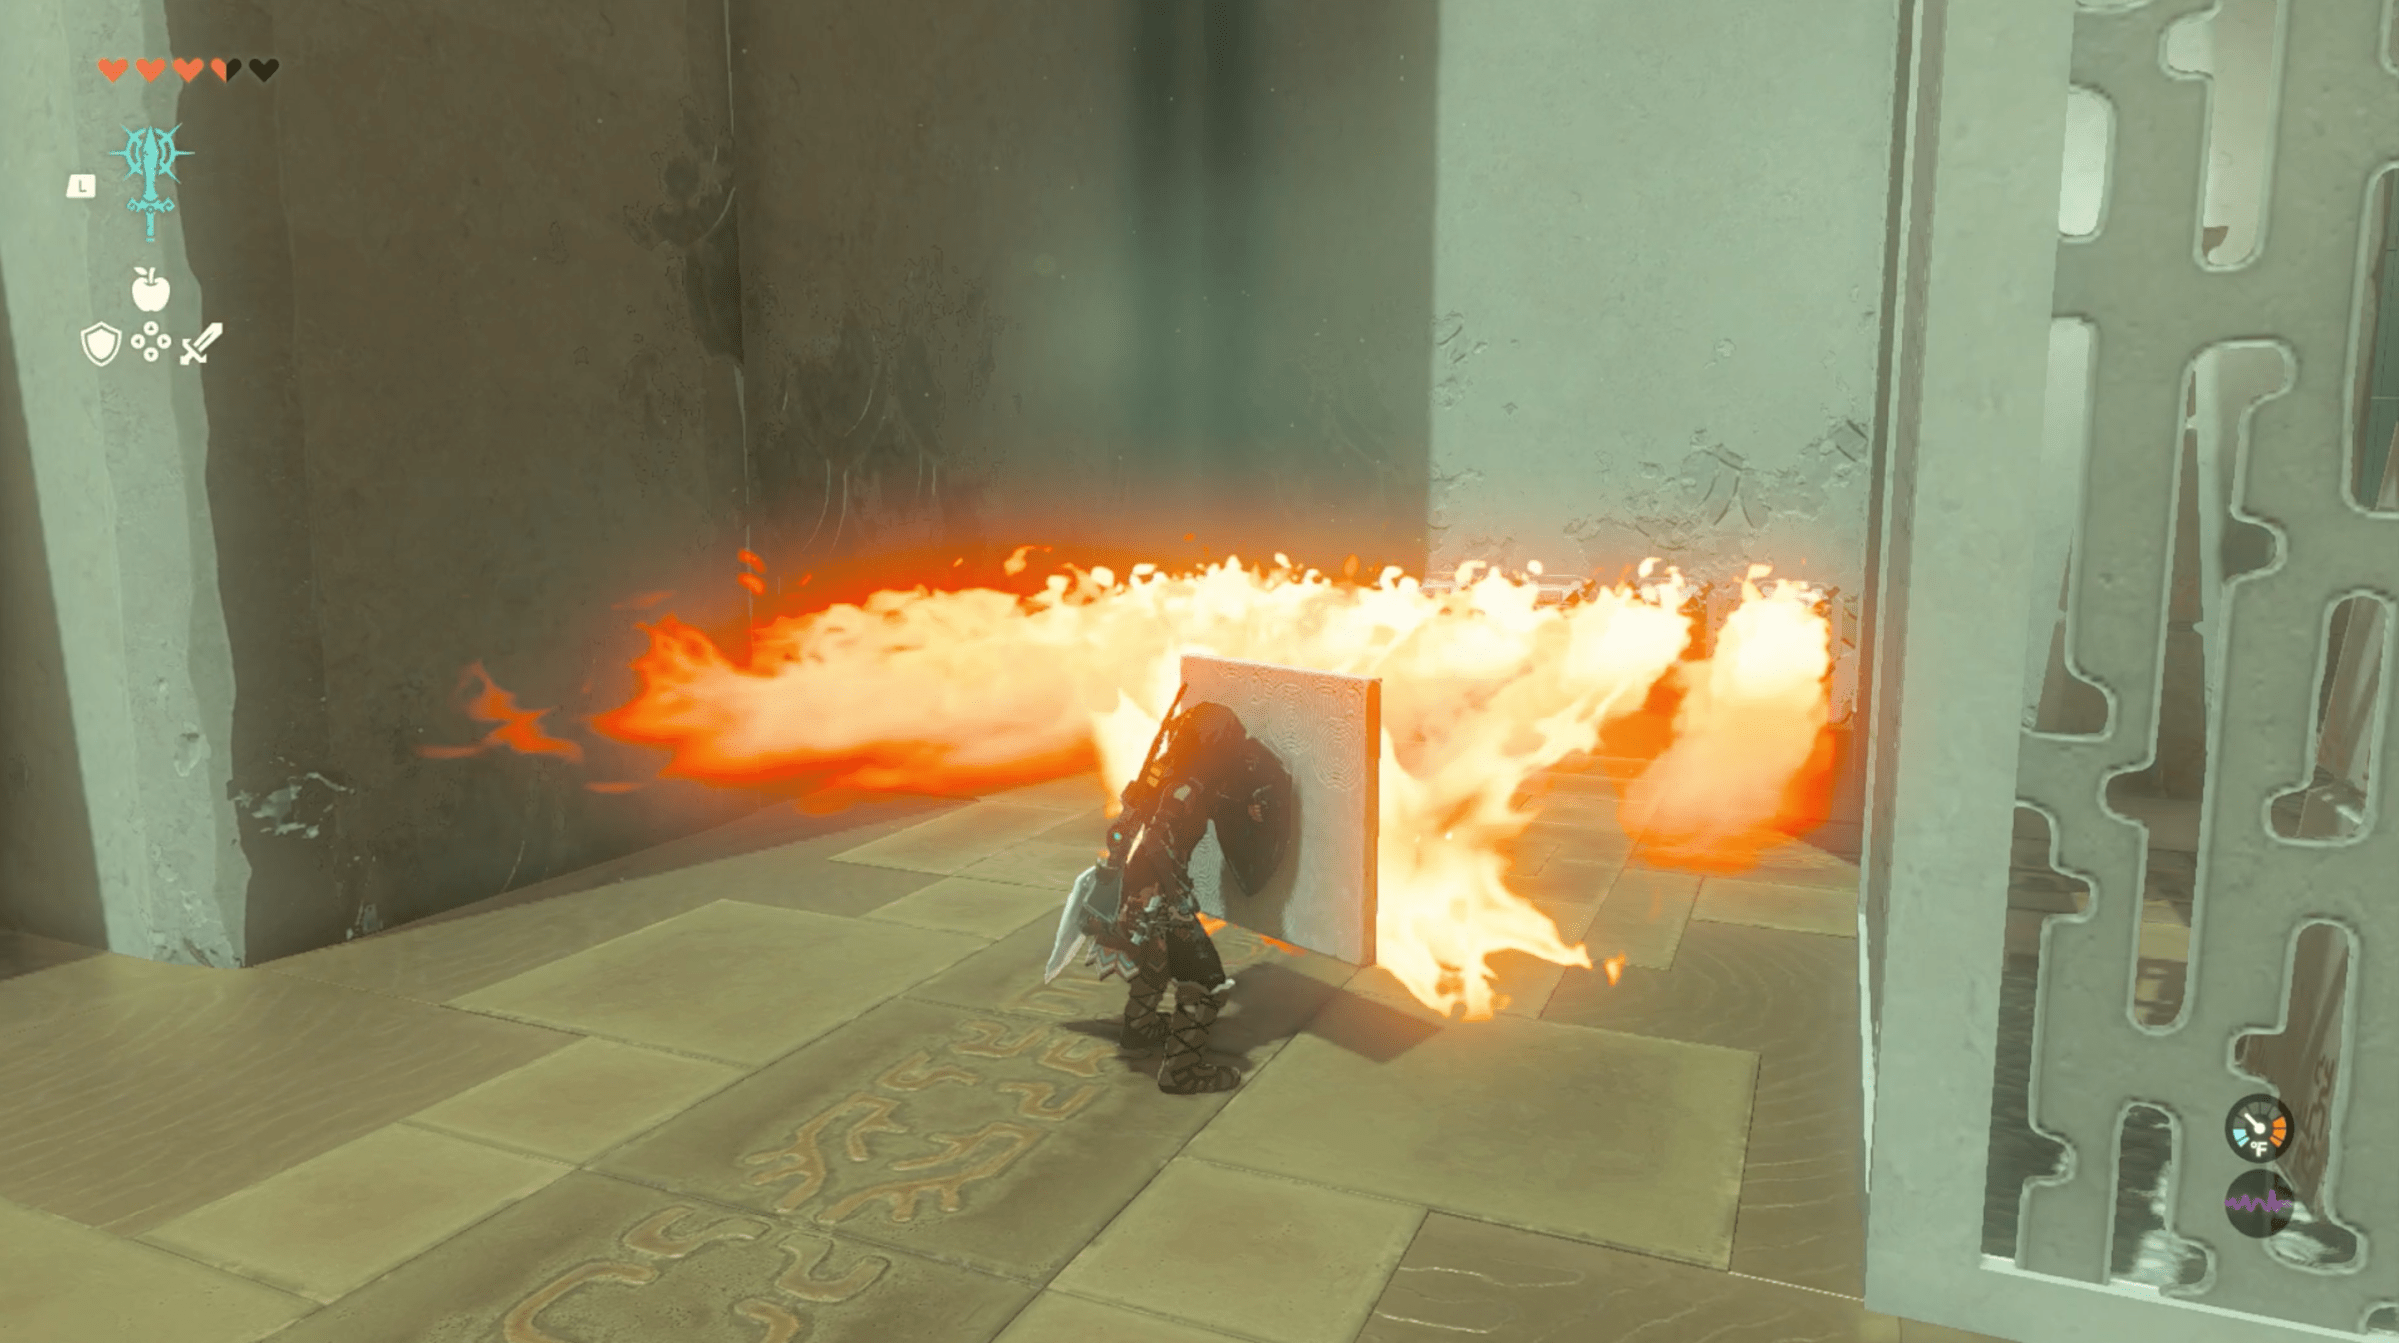
5. Grab the stone-slab shield and equip it. Then walk toward the line of flamethrowers in the room. As you approach the flamethrowers, hold out your shield — as if you would defend against an enemy — and use it to block the flames so you can safely walk through to the next area.
6. Walk to the next room and defeat a third Construct.
7. Just like an elementary school science fair, you’ll see rockets everywhere. Grab a spare shield, then Fuse a rocket to it.
8. Activate the rocket and ride it to the upper level of the room where the Light of Blessing is located.